🎲 Go to our own publishing house | DSV GAMES

tutorial-harnas-schilderen-the-army-painter

The Army Painter

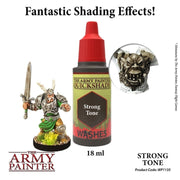
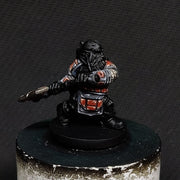
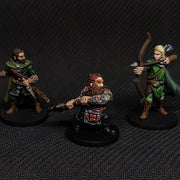
In this blog I complete the iconic hero trio from the world of Lord of the Rings, with everyone's favorite dwarf Gimli in the spotlight. This model from the game Journeys in Middle-Earth has a bit more armor than its colleagues Legolas and Aragorn, a great opportunity to pay some extra attention to that in this tutorial. I use layering, the Quickshade from The Army Painter and try to paint an interesting and colorful armor with more than just metallic paint. The number of colors I use for the armor is limited to the primary colors and black and white to darken or lighten colors. All colors are available again in the Army Painter Warpaints Starter Set .

As always, I start with a black primer that is given plenty of time to dry. Because I focus this blog mainly on the armor, I will immediately start with the base layers, instead of starting with the face and other deep parts. To give a steel-like color to the apron, shoulder panels and some details on the axe, I make a mixture of Matt Black and Matt White and mix Ultramarine Blue to taste. This allows me to achieve a beautiful steel blue color after some trying. You could go a little darker for a real anthracite, for this you can add some Greenskin instead of the blue color. I thin the paint well enough to spread it well and give the mini 2 thin coats on the metal parts. I will leave the chain mail and the ax blade black for a while.

  • To provide the armor with some color and contrast, I am going to give a number of elements a striking color. With a mixture of Pure Red and Daemonic Yellow I create an intense color orange. With this I paint the symbols on the shoulder, a few smaller panels on the arms and some details on the apron.

  • I also pick up a few similar pieces on the ax blade. Then I paint the ax blade and the chain mail with Plate Mail Metal .

  • miniatuur-verf-the-army-painter-qs-strong-tone-ink-18-ml (1)

    Once these colors have dried nicely, it's time for a layer of Quickshade Strong Tone . This shade ensures that all the cracks in the chain mail become neatly dark, the lines on the steel blue are nicely defined and the orange becomes slightly less intense. I let this quickshade dry for at least half an hour so that I don't accidentally mix anything with wet quickshade later.

  • If you use a wet palette, your mixture for the steel blue part should still be usable. If not, mix this again as best you can, but this time try to make it a little lighter. If you still have the old color you can of course just add some Matt White. To give the impression of sharp and reflective surfaces, I'm going to make nice highlights in some clever places. To do this, I make the paint a little thinner than normal, after which I apply a layer of the slightly lighter color to the places where the light would realistically fall. These are the edges on top of metal parts, but also the corners of metal parts, for example. Be sure to look at the image to get an idea of ​​the right places to highlight. Make the color a little lighter as you make the area you paint smaller, so you are left with almost white in the sharpest points and corners. Just don't make the total highlighted area too large, the majority of the panels can remain nice and dark.

  • I repeat the above step with the orange panels. This time too I use the old orange color and gradually lighten it by adding white. Using white also makes the orange a bit paler, making the end result appear less intense. The orange parts are slightly smaller than the steel blue parts, so be careful not to make the highlights too big.

  • With the armor pieces fully highlighted you can paint the rest of Gimli to your taste. With the instructions from the previous blog about layering you will find everything you need to know to give the skin and clothing a fantastic paint job. I went for a warm skin color, a reddish-brown beard and the clothing is green, brown and gray to stay in the atmosphere of the forest. At the end I give the mini another layer of Satin Varnish for protection. Gimli has become a good match with his friends Aragorn and Legolas, ready to mow down all kinds of enemies in Journeys in Middle-Earth. Speaking of enemies, they will be discussed in the next blog. I hope to see you then!

Login

Forgot your password?

Don't have an account yet?
Create account